How to Identify and Resolve Common Flooring Installation Mistakes and Problems
Installing new flooring brings fresh style and durability—yet even minor missteps can compromise performance and appearance. Understanding the common issues you might face with new flooring installations empowers homeowners and builders to prevent delays, reduce repair costs, and enjoy long-lasting results. This guide from Cabstone’s flooring experts in the Boston North region outlines:
- The most frequent installation mistakes and their root causes
- Techniques to detect defects early and safeguard your investment
- DIY fixes for minor gaps, squeaks, and moisture concerns
- Professional protocols that ensure flawless subfloor prep, acclimation, and moisture control
- Material-specific troubleshooting for hardwood, laminate, vinyl, tile, and carpet
- Best practices for acclimation, moisture testing, and expansion gap calculation
- How local homeowners in Boston North can leverage our showroom consultation and warranty-backed services
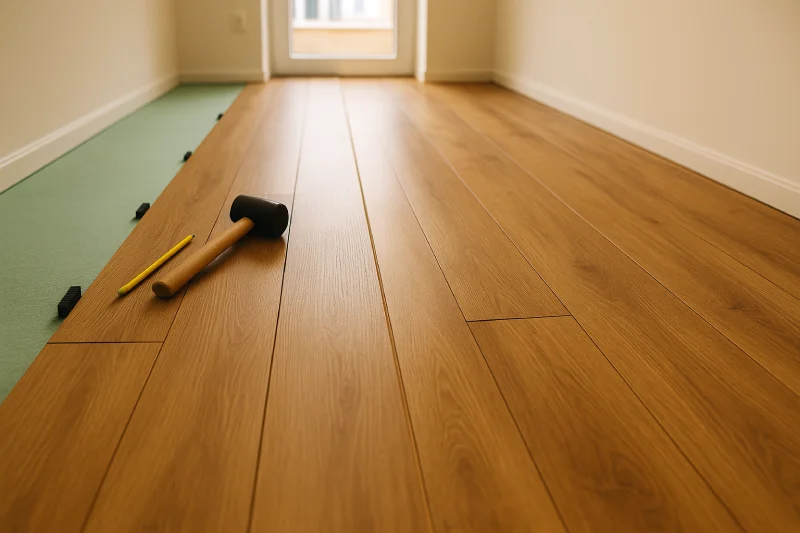
Common Flooring Installation Mistakes to Watch For
Improper flooring installation often stems from foundational oversights that manifest as gaps, warping, or moisture damage. Recognizing these mistakes early reduces rework and preserves material integrity.
Causes of Flooring Problems from Improper Subfloor Preparation
Subfloor preparation defines stability and moisture resistance. An uneven or damp subfloor prevents adhesive bonding and creates movement underfoot.
- Failing to level high and low spots beyond 3/16″ over 10′ allows boards to rock and squeak.
- Neglecting moisture barriers on concrete slabs invites vapor transmission that leads to cupping or adhesive failure.
- Ignoring subfloor damage (rot, delamination, soft spots) results in localized collapse or plank separation.
Correcting subfloor deficiencies before installation prevents uneven surfaces and premature floor failure, laying the groundwork for a uniform finish and stable material performance.
Common Flooring Installation Problems and Their Solutions
This article identifies poor subfloor preparation and inadequate acclimation as key causes of flooring failures. It explains that an improperly prepared subfloor can lead to unevenness and cracks, while neglecting acclimation can result in gaps, cupping, crowning, or buckling due to changes in temperature and humidity.
This research directly supports the article's emphasis on the critical roles of proper subfloor preparation and material acclimation in preventing common flooring installation issues.
Importance of Flooring Acclimation and Consequences of Neglect
Acclimation equalizes plank moisture content with the room’s temperature and humidity. Without it, wood and vinyl adjust post-installation, causing irreversible distortion.
- Hardwood: Needs 5–7 days to stabilize moisture exchange; skipping this invites cupping or gapping.
- Engineered Wood: Requires 2–4 days to align layers; rushed installation leads to plank buckling.
- Luxury Vinyl Plank (LVP): Benefits from 24–72 hours rest to expand or contract; neglecting acclimation may cause peeling or seams showing.
Proper acclimation ensures dimensional stability and avoids warping, buckling, and separation across the finished floor.
Consequences of Insufficient Expansion Gaps Leading to Buckling and Warping
Flooring materials expand and contract with temperature and humidity shifts. Without perimeter and transition gaps, boards press against fixed objects.
- Closing gaps less than 1/4″ per 10 ft. of run forces planks to deform upward (buckling).
- Installing tight against walls or cabinets transfers stress inward, creating ridges or warps.
- Skirting or shoe mold installed before gap provision locks movement, hiding but not solving the underlying pressure.
Maintaining recommended expansion clearances prevents stress build-up and preserves flat, uniform surfaces over seasonal cycles.
Moisture-Related Issues Affecting Flooring Longevity
Excess moisture undermines material integrity through swelling, mold growth, and adhesive breakdown.
- Cupping: Edges rise above the center due to high subfloor moisture.
- Crowning: Centers protrude when surface moisture exceeds subfloor levels.
- Adhesive Failure: Humidity variation weakens glue bonds in vinyl or engineered wood installations.
- Mold and Mildew: Trapped water beneath moisture-sensitive materials invites health-hazardous growth.
Controlling moisture at the source through vapor barriers, dehumidification, and consistent HVAC conditions extends flooring longevity and aesthetics.
Impact of Choosing the Wrong Flooring Material on Installation Success
Selecting an unsuitable flooring type for the subfloor, traffic, or moisture conditions sets the stage for failure.
- Hardwood over concrete without proper underlayment and moisture control can lead to rot and distortion.
- Laminate in damp basements without waterproof cores risks swelling and delamination.
- Ceramic tile on unstable subfloors transmits movement and causes grout cracking.
- Carpet in high-traffic entries wears unevenly without durable fiber choices.
Matching material characteristics—rigidity, water resistance, installation method—to site conditions ensures installation success and reduces post-installation issues.
Identifying and Diagnosing Common Flooring Problems After Installation
Spotting early symptoms of flooring defects safeguards your investment and helps determine whether a DIY remedy or professional service is needed.
Visual and Physical Signs of Subfloor Issues
Visible irregularities and underfoot sensations reveal subfloor problems.
- Uneven Surface: Noticeable slopes or dips when walking indicate framing or leveling flaws.
- Squeaks or Creaks: Movement between subfloor panels or between subfloor and joists signals loose fasteners or insufficient adhesive.
- Localized Soft Spots: Pressing on areas that yield under weight suggests moisture damage or rot.
Recognizing these cues prompts immediate subfloor inspection and remediation before full flooring replacement is necessary.
Early Detection of Flooring Buckling, Gapping, and Warping
Early detection prevents extensive damage and costly reinstallation.
- Inspect seams for separation exceeding 1/8″, especially near walls or transitions.
- Look for raised planks or ridges along runs that indicate buckling under pressure.
- Examine borders for misaligned boards that lift or dip underfoot.
Documenting defects within manufacturer warranty periods streamlines repair or replacement.
Causes and Detection of Squeaky Floors
Floor squeaks occur where rigid flooring moves against subfloor or joists.
- Walk across suspect areas, noting squeak locations for spot investigation.
- Use a flashlight to check gaps where fasteners may have loosened under movement.
- Insert shims or talcum powder between boards to identify friction points.
Isolating squeaks in small zones leads to targeted fastening or subfloor reinforcement.
Recognizing Moisture Damage Like Cupping and Crowning
Moisture damage manifests in board distortion patterns.
- Cupping: Edges elevated above centers; indicate high subfloor moisture.
- Crowning: Center arches above edges; often follow sanding of cupped floors without resolving humidity.
- Discoloration or Staining: Visible water marks or mold growth along seams.
Measuring humidity with a moisture meter confirms moisture differentials and guides remediation plans.
When a Flooring Problem Requires Professional Help
Significant structural or moisture issues during floor installation call for expert intervention.
- Large-scale distortion affecting more than 10% of the surface.
- Persistent squeaks after fastening attempts suggest framing instability.
- Core moisture readings exceed manufacturer thresholds (>14% for wood).
- Visible mold or rot indicates health risks and subfloor replacement.
Professional assessment ensures correct diagnosis and permanent resolution without needless replacement.
Effective DIY Fixes for Minor Flooring Installation Issues
Homeowners can resolve small gaps, squeaks, and moisture fluctuations with basic tools and materials.
Correcting Small Gaps and Expansion Gap Problems
Closing minor seams and providing movement space prevents further separation.
- Insert Wood Slivers – Tap in tapered slivers coated with wood glue into gaps under boards.
- Re-trim Boards – Remove perimeter moldings, cut plank edges to widen the expansion gap by 1/8″ to 1/4″.
- Reinstall Baseboard – Reattach trim after gap correction to conceal the clearance.
These steps restore seamless surfaces and relieve internal stresses before professional rework is needed.
Quick Solutions for Squeaky or Uneven Floors
Targeted repairs quell noise and level minor irregularities.
- Squeak No More Kits: Drive special screws diagonally through flooring into joists and cover heads with wood plugs.
- Underfloor Shims: Lift boards slightly and insert composite shims or construction adhesive under subfloor gaps.
- Self-Leveling Compound: Pour a leveling mix into low spots for a flat surface beneath floating floors.
Implementing these measures restores stability and quiet without ripping out entire floor systems.
Managing Minor Moisture Issues Before They Worsen
Maintaining balanced humidity and controlling leaks protects flooring materials.
- Use Dehumidifiers – Keep indoor RH between 35% and 55% to prevent swelling.
- Check for Leaks – Inspect pipes and appliances near flooring for drips or condensation.
- Apply Sealants – Re-seal grout lines and perimeter expansion spaces to block vapor entry.
Early moisture management curtails cupping and adhesive breakdown until professional waterproofing can be scheduled.
When to Avoid DIY and Call a Professional Installer
Recognize your limits to ensure safety and workmanship quality.
- Structural framing or joist repairs are beyond homeowner scope.
- Subfloor replacement due to rot or mold demands specialized tools and disposal.
- Complex moisture mitigation with vapor barriers and drainage systems requires professional expertise.
- Material warranty stipulations often void if unlicensed installers perform critical steps.
Opting for certified installers for these scenarios preserves warranties and ensures compliant, durable results.
How Professional Flooring Installers Prevent and Resolve Installation Problems
An experienced flooring contractor applies rigorous protocols to eliminate errors and guarantee floor longevity.
Key Steps in Proper Subfloor Preparation by Professionals
Experts ensure a stable, moisture-safe foundation with three essential actions:
| Preparation Step | Objective | Outcome |
| Moisture Testing | Measure slab or plywood RH levels | Identify need for vapor barriers before install |
| Leveling & Grinding | Correct high/low spots | Flat tolerance within 3/16″ over 10 ft |
| Subfloor Repair/Replacement | Remove damaged sections | Solid support free of rot or delamination |
Expert Management of Flooring Acclimation and Material Handling
Certified installers follow manufacturer protocols for temperature and humidity control:
- Store materials in conditioned spaces at 65°F–75°F and 35%–55% RH.
- Stack boards with spacers to allow air circulation around each plank.
- Document acclimation time and moisture readings before layout begins.
These measures assure that materials reach equilibrium, eliminating post-installation movement.
Crucial Role of Expansion Gaps and Correct Installation
Pros calculate and implement movement space to accommodate environmental shifts.
| Location | Recommended Gap | Installation Method |
| Perimeter Walls | 1/4″ per 10 ft | Use spacers during plank installation |
| Transitions & Doorways | 1/2″ for large spans | Install transition strips over gap |
| Fixed Objects (cabinets) | 3/8″ continuous | Maintain gap hidden by base or trim |
Professional Approaches to Moisture Damage and Remediation
Expert remediation combines detection, barrier installation, and repair:
- Infrared Scanning to detect hidden moisture pockets under floors.
- Epoxy or Acrylic Moisture Barriers applied to slab surfaces or underlayment.
- Selective Plank Replacement for cupped or crowned areas, followed by sanding to seamless finish.
This systematic approach resolves both symptoms and sources, restoring performance and warranty compliance.
Certifications and Expertise to Look for in a Flooring Installer
Choosing accredited professionals ensures adherence to industry standards:
- NWFA Certified for hardwood installation best practices.
- TCNA Certified tile installers meeting grout and substrate guidelines.
- Manufacturer Trained credentials for specific vinyl, laminate, and engineered wood lines.
Certified teams bring verified skills, tools, and insurance coverage essential for durable, high-quality installations.
Flooring Problems by Material Type and Their Resolution
Each flooring category presents unique challenges requiring tailored solutions that professionals and informed homeowners should understand.
Common Hardwood Flooring Installation Issues and Solutions
Hardwood reacts visibly to environmental and subfloor variables:
- Gapping – Caused by low RH; resolved by humidity control and seasonal re-sanding.
- Cupping/Crowning – Indicates moisture imbalance; remedied by moisture barrier installation and plank replacement.
- Squeaks – Result from loose fasteners; corrected with angled screws and wood patches.
Targeted interventions restore hardwood stability and aesthetic continuity.
Identifying and Fixing Laminate and Vinyl Plank Flooring Problems
Synthetic planks require strict substrate and gap controls:
- Lifting/Peaking – From improper locking; undone by relaying boards with correct tongue-and-groove engagement.
- Adhesive Failures (for glued vinyl) – Seams separate when subfloor moisture rises; fixed by re-adhesion with moisture-resistant glues.
- Surface Wear – Excess traffic scratches; prevent with protective coatings or loose-lay transitions.
Adhering to installation guidelines preserves structural interlock and surface integrity.
Tile and Grout Installation Issues to Watch For
Rigid ceramics demand stability and consistent grout application:
- Cracking – From subfloor movement; solved by installing uncoupling membranes and controlling deflection.
- Grout Discoloration or Failure – Indicates improper mixing or sealing; corrected through regrouting with enhanced polymer additives.
- Lippage – Uneven tile edges; leveled using specialized clips and leveling systems during installation.
Proper substrate decoupling and joint sealing prevent cracking and water intrusion.
Differences in Carpet Installation Problem Identification and Repair
Soft surfaces mask subfloor nuances but reveal failures in tension and seam placement:
- Wrinkles/Buckling – Caused by improper stretcher usage; resolved by restretching with power stretchers.
- Loose Edges – Carpet not anchored in tack strips; fixed by reattaching edges and replacing worn tack strips.
- Pile Distortion – From high-pressure rollers; corrected by re-power-stretching and protecting transitional edges.
Understanding carpet tension mechanics prevents ripples and seam openings in high-traffic zones.
Role of Underlayment in Preventing Flooring Issues
Underlayments cushion, level, and isolate moisture:
| Underlayment Type | Function | Ideal Application |
| Foam Pad | Sound reduction, minor leveling | Floating laminate installations |
| Cork or Rubber | Thermal insulation, cushion | Hardwood in multi-story dwellings |
| Cementitious Backer Unit | Crack isolation, moisture barrier | Ceramic and porcelain tile installs |
The Ultimate Guide to Flooring Underlayment: Why It Matters for a Perfect Floor Installation
This guide highlights underlayment as a critical component for successful flooring installation, providing a smooth surface and acting as a barrier against moisture, noise, and temperature fluctuations. It stresses that a well-chosen and properly installed underlayment can prevent unevenness, buckling, and moisture damage, thereby extending the flooring's lifespan.
This research directly supports the article's discussion on the importance of underlayment in mitigating moisture issues and ensuring the stability and longevity of installed flooring.
Best Practices for Flooring Acclimation and Subfloor Preparation
Preventing installation mistakes begins with controlled environments and precise substrate work to uphold warranty conditions and performance expectations.
Acclimation Duration for Different Flooring Materials
Material–specific acclimation periods ensure dimensional stability:
- Hardwood: 5–7 days in conditioned spaces at target RH and temperature.
- Engineered Wood: 2–4 days to stabilize core layers.
- Luxury Vinyl Plank: 24–72 hours to adjust core and wear layer.
- Laminate: 48–72 hours to equilibrate glue and board moisture.
Adhering to these timeframes prevents post-installation movement and surface irregularities.
Steps for Proper Subfloor Moisture Testing and Leveling
Professionals follow a detailed protocol to validate subfloor readiness:
- Calibrate Moisture Meter to manufacturer specifications.
- Take Multiple Readings across the entire surface, including edges and center.
- Compare to Material Tolerance (<3% difference between subfloor and plank).
- Apply Self-Leveling Compound in low zones and grind high ridges beyond tolerance.
This systematic process confirms a dry, flat foundation before glue or mechanical fastening begins.
Calculating and Maintaining Correct Expansion Gaps
Expansion gap calculation uses run length and board width:
- Divide total linear footage by 10 ft to determine inches of gap needed (e.g., 20 ft run → 2″ gap distributed equally).
- Use consistent spacers along walls and fixed objects during install.
- Cover gaps later with baseboard or transition profiles to conceal while preserving movement space.
Accurate gap provision prevents buckling and promotes floor longevity under environmental fluctuations.
Moisture Control Measures to Prevent Flooring Damage
Combining moisture barriers and environmental management safeguards materials:
- Vapor Barriers: 6 mil polyethylene sheeting beneath underlayments blocks ground moisture.
- Silicate Sealers: Applied to concrete slabs to reduce porosity and vapor drive.
- Climate Control: HVAC systems maintaining stable RH year-round.
- Proper Drainage: Exterior grading and gutter systems divert water away from foundation.
Integrating these layers of protection stops moisture at each entry point and preserves flooring integrity.
How Regional Climate in Boston North Affects Flooring Installation
New England’s humidity swings and cold winters demand localized strategies:
- Winter Low RH prompts supplemental humidification to avoid gapping in hardwood.
- Summer High RH requires dehumidification or additional vapor barriers for below-grade installations.
- Freeze-Thaw Cycles impact foundation moisture levels, making pre-install drainage and vapor control essential.
Accounting for Boston North’s climate patterns guarantees stable flooring performance year-round.
Benefits of Professional Flooring Installation Services for Homeowners in Boston North
Local expertise delivers precision, reliability, and flooring solutions with peace of mind—crucial for lasting renovations in the Boston North region.
Choosing a Professional Installer Over DIY for Flooring Projects
Professionals combine training, tools, and warranties to minimize risk:
- Certified installers follow manufacturer specifications and industry standards.
- Specialized equipment (moisture meters, grinders, power stretchers) ensures accuracy.
- Insurance coverage protects homeowners against installation-related liabilities.
Searching for flooring contractors near me and partnering with experts reduces callbacks, preserves warranties, and secures long-term value.
The Typical Flooring Installation Process with Experts
A structured workflow ensures consistency and quality control:
- Consultation & Site Assessment – Evaluate subfloor, moisture levels, and material suitability.
- Preparation & Acclimation – Level substrate, install barriers, and condition materials.
- Installation – Precision cutting, fastening or gluing, gap provision, and trimming.
- Finishing & Cleanup – Sanding (if required), sealing, and final inspection.
Clear steps and communication with installers keep projects on schedule and on budget.
Professional Services Offer Warranties and Long-Term Support
Reputable installers back workmanship and materials with comprehensive guarantees:
- Workmanship Warranty covers installation defects for defined periods.
- Manufacturer Warranty remains valid when certified installers are used.
- Maintenance Guidance ensures proper care, prolonging floor life.
Warranty-backed services provide owners with recourse for future issues and reinforce trust in their investment.
Scheduling a Consultation or Visiting the Flooring Showroom in Boston North
Booking a personalized appointment streamlines project initiation:
- Call our Boston North office or submit an online request form.
- Tour our showroom to explore hardwood, vinyl, tile, and carpet options in person.
- Review samples, color options, and underlayment alternatives with design specialists.
Engaging early with flooring professionals accelerates planning and secures installation slots in busy seasons.
Real Case Studies of Flooring Problem Resolution in Boston North
Local successes demonstrate proven expertise and customer satisfaction:
- Historic Home Restoration – Resolved severe hardwood cupping by installing a full subfloor vapor barrier and custom-repairing original planks.
- Basement Conversion – Prevented laminate swelling by applying a moisture-blocking underlayment and precision gap calculation.
- Commercial Café Flooring – Eliminated tile lippage and grout cracking via uncoupling membranes and professional leveling, extending service life by 50%.
Conclusion
Installing new flooring without surprises demands rigorous preparation, precise techniques, and local expertise. By understanding common mistakes, early diagnosis methods, DIY fixes, and professional best practices, homeowners and builders in Boston North can achieve flawless, long-lasting floors.
To ensure your next flooring project stands the test of time, schedule a consultation at our Boston North showroom or request a detailed site assessment today with CabStone, your trusted flooring company.
Frequently Asked Questions
What is the most common flooring installation mistake?
The most common flooring installation mistake is inadequate subfloor preparation, including failing to level the surface or address moisture issues. This can lead to a host of problems like squeaks, unevenness, and premature wear.
How long should flooring materials acclimate before installation?
Acclimation times vary by material. Hardwood typically needs 5-7 days, engineered wood 2-4 days, luxury vinyl plank 24-72 hours, and laminate 48-72 hours. Always follow the manufacturer's specific recommendations.
What causes floors to squeak after installation?
Squeaky floors usually result from movement between the flooring planks, the subfloor, or the joists. This can be due to loose fasteners, insufficient adhesive, or improper subfloor installation.
How do I fix cupping or crowning in my flooring?
Cupping (edges higher than the center) typically indicates high subfloor moisture, while crowning (center higher than edges) can occur after sanding cupped floors without resolving the moisture issue. Both require addressing the moisture source and may involve plank replacement.
Why are expansion gaps important in flooring installation?
Expansion gaps are crucial because flooring materials expand and contract with changes in temperature and humidity. Without adequate gaps around the perimeter and at transitions, the flooring can buckle or warp under pressure.
Can I install hardwood flooring over a concrete slab?
Yes, but it requires careful preparation. You'll need a proper underlayment and a robust moisture barrier to prevent rot and distortion caused by moisture transmission from the concrete.
What are the signs of subfloor damage that can affect flooring?
Signs include uneven surfaces, soft spots that yield under pressure, visible rot or delamination, and persistent squeaks that indicate loose fasteners or structural issues.
How does the regional climate affect flooring installation?
Regional climates with significant humidity swings (like Boston North) require careful attention to acclimation and moisture control. Winter low humidity can cause gapping, while summer high humidity can lead to swelling.
When should I call a professional for flooring issues?
You should call a professional for significant structural issues, widespread distortion, persistent squeaks, high moisture readings exceeding manufacturer limits, or visible mold/rot. These issues often require specialized tools and expertise.
What is the role of underlayment in preventing flooring problems?
Underlayment provides cushioning, helps level minor subfloor imperfections, reduces noise, and can act as a moisture barrier, preventing issues like buckling, squeaking, and moisture damage, thereby extending the flooring's lifespan.