How to Choose the Best Flooring Installation Technique: Complete Guide to Flooring Installation Methods

Selecting the right flooring installation technique ensures lasting performance, aesthetic appeal, and a hassle-free process from start to finish. This flooring installation techniques guide empowers homeowners and home improvement contractor in the Boston North region to avoid common pitfalls—such as uneven surfaces, moisture damage, and costly rework—by matching subfloor conditions, budget, and material choices with the ideal method. You will discover:
- The main types of installation techniques and when each excels
- Key decision factors—from flooring type to room environment
- Side-by-side comparisons of cost, difficulty, and subfloor requirements
- Step-by-step subfloor preparation for flawless results
- Benefits of professional services and local expertise
- Best installation approaches for hardwood, laminate, engineered wood, vinyl, and tile
- Answers to top homeowner concerns without guesswork
This guide builds a semantic framework that unifies each section under one comprehensive strategy, equipping you to make confident decisions or book a consultation with seasoned experts at Cabstone.
Main Types of Flooring Installation Techniques
Flooring installation techniques encompass the methods used to secure flooring materials to a subfloor, directly influencing durability, sound transmission, and maintenance. Choosing correctly prevents cupping, gapping, and moisture issues while optimizing appearance. For example, a floating laminate finish delivers rapid, DIY-friendly results, whereas a glue-down vinyl plank offers a moisture barrier ideal for kitchens. Understanding each approach sets the stage for evaluating factors like subfloor condition and material compatibility.
Floating Floor Installation
Floating floor installation involves interlocking planks that rest on an underlayment without mechanical attachment to the subfloor. This method enhances sound insulation and accommodates minor subfloor movement, making it ideal for laminate, engineered wood, and luxury vinyl plank (LVP).
Pros:
- Quick, tool-light installation
- Effective sound damping with underlayment
- Allows natural expansion and contraction
Cons:
- Potential for edge gapping if subfloor is uneven
- Underlayment adds material cost
Floating floors excel in living areas and upstairs bedrooms, and they transition seamlessly between rooms without glue or nails, preparing you to compare more permanent methods next.
Glue-Down Installation
Glue-down installation uses specialized adhesives to bond flooring planks directly to the subfloor, ensuring minimal movement and enhanced moisture resistance. This mechanism creates a continuous, stable surface suitable for engineered wood, vinyl tile, and ceramic tile.
Pros:
- Superior stability for high-traffic zones
- Moisture barrier when using waterproof adhesive
- Reduced floor height fluctuation
Cons:
- Longer cure time before foot traffic
- Off-gassing concerns if not properly ventilated
By understanding adhesive types and surface preparation, you can prevent common bonding failures and move on to explore traditional fastening methods.
Nail-Down and Staple-Down Installation Methods
Nail-down and staple-down methods secure solid or engineered hardwood to a plywood subfloor using nails or staples driven through the face or tongue of each board. This traditional mechanism ensures a firm connection that withstands heavy loads and refinishing.
Pros:
- Time-tested stability for hardwood floors
- Allows board replacement and refinishing
- No adhesives required
Cons:
- Requires pneumatic tools and experience
- Potential for squeaks if fasteners loosen
Knowing when to choose nails versus staples depends on the wood species, board thickness, and subfloor composition, paving the way to compare tool-free options next.
Click-Lock Installation
Click-lock installation features planks with interlocking edges that snap together without nails or glue. This mechanism promotes rapid assembly and easy removal for repair or reuse, making it a user-friendly choice for DIY and rental properties.
Pros:
- Tool-free installation in most scenarios
- Instant surface for immediate use
- Easily removed and repositioned
Cons:
- Susceptible to gapping on uneven subfloors
- Limited acoustic performance without quality underlayment
Understanding click-lock assembly clarifies why it’s often favored for laminate and LVP, and leads into subfloor compatibility considerations.
Subfloor Conditions and Installation Technique Choice
Subfloor condition dictates which installation method will achieve a stable, level finish. For instance, a cracked concrete slab requires moisture testing and possible vapor barriers before any glue-down or floating method. Meanwhile, a plywood subfloor in good shape can support nail-down hardwood with minimal leveling.
Key considerations:
- Flatness tolerance (generally within 3/16" over 10')
- Moisture levels (≤3 lb/24 hr or ≤5% relative humidity for wood)
- Structural integrity (no rot, delamination, or excessive deflection)
Assessing subfloor readiness prevents future failures and transitions smoothly into choosing factors for your specific project.
Factors to Consider When Choosing a Flooring Installation Method
Selecting the optimal installation technique hinges on multiple factors that determine long-term performance and visual outcomes. A holistic assessment avoids costly mistakes such as improper adhesives or insufficient subfloor prep, ensuring the chosen method aligns with your project’s priorities.
Flooring Type Influence on Installation Method Selection
Flooring material properties—thickness, rigidity, moisture resistance—directly shape installation choices:
- Solid Hardwood: Prefers nail-down for a secure, refinishing-friendly finish
- Engineered Wood: Accommodates glue-down or floating based on thickness
- Laminate: Typically floating or click-lock for easy installation
- Vinyl Plank/Tile: Offered in glue-down, floating, or click-lock formats
- Tile: Always requires thinset adhesive or mortar bed for stability
Matching these methods to material characteristics optimizes performance and leads naturally into subfloor material considerations.
Subfloor Material and Condition Criticality for Installation
The subfloor material—whether concrete, plywood, or oriented strand board (OSB)—and its condition determine adhesion, fastener holding strength, and alignment:
- Concrete: Needs moisture testing, vapor barriers, and possible self-leveling compounds
- Plywood/OSB: Must be securely fastened, flat, and free of soft spots
- Underlayment: Provides acoustic insulation and minor leveling
Proper substrate selection and prep support each installation technique’s requirements and segue into room environment factors.
Room Environment and Moisture Levels Impact on Installation
Room climate—temperature and humidity—and moisture exposure in basements or bathrooms guide method choice:
- High-moisture areas benefit from glue-down or waterproof click-lock vinyl
- Interior living spaces accommodate floating or nail-down wood floors
- Seasonal humidity swings in Boston North demand acclimation and expansion gaps
Factoring in environmental conditions ensures your floor remains stable year-round and transitions into budget considerations.
Role of Budget in Choosing Installation Techniques
Budget influences material, labor, adhesive, and prep costs—each installation method carries distinct price points:
- Floating floors: Lower material and labor costs, moderate underlayment expense
- Glue-down: Higher adhesive and labor rates, longer installation time
- Nail/Staple: Premium labor costs due to specialized tools and skill
- Click-lock: Mid-range materials, minimal labor costs
Balancing upfront investment against long-term durability shapes your decision and prepares you to weigh DIY versus professional options.
When to Opt for Professional Installation Over DIY
Complex floor installation methods or large-scale projects often justify professional expertise:
- Intricate patterns (herringbone, parquet) and wide-plank hardwood
- Moisture-sensitive installations requiring vapor barriers
- Warranty preservation and manufacturer compliance
- Specialized tools and skilled craftsmanship
Understanding these criteria clarifies when expert installation ensures performance and shifts into direct method comparisons.
Comparison of Different Flooring Installation Methods
Comparing installation techniques side by side highlights trade-offs in cost, difficulty, and subfloor demands, guiding you to the best fit for your project’s scope and priorities.
Floating vs Glue-Down Installation
| Floating Installation | Glue-Down Installation |
| Pros: Quick DIY assembly, sound buffer | Pros: Enhanced stability, moisture resistance |
| Cons: Sensitive to subfloor unevenness | Cons: Longer cure time, adhesive off-gassing |
Floating floors offer speed, while glue-down ensures a solid, sealed surface—each addressing different performance needs and leading into fastening comparisons.
Nail-Down and Staple-Down Methods Differences
| Feature | Nail-Down | Staple-Down |
| Holding Mechanism | Full-headed nails driven angled | U-shaped staples securing the tongue |
| Best Use | Thick hardwood for refinishing | Engineered wood with denser core |
| Installation Speed | Moderate | Faster per board |
Nail-down offers a traditional feel and repairability, whereas staple-down accelerates installation but may require heavier gauge fasteners.
Click-Lock Installation Ease
Click-lock’s interlocking edges eliminate nails and glue, enabling rapid, floating-style installation. Its tool-free mechanism reduces labor time, though it demands a flat subfloor to prevent plank separation under traffic.
Installation Costs and Difficulty Levels by Method
| Installation Method | Estimated Cost ($/sq ft) | Difficulty Level |
| Floating | 2–5 | Low |
| Glue-Down | 3–7 | Medium |
| Nail/Staple-Down | 4–8 | High |
| Click-Lock | 2–6 | Low |
This cost-difficulty matrix clarifies budget-skill trade-offs and flows into subfloor requirements essential for each technique.
Typical Subfloor Requirements for Each Installation Type
| Method | Subfloor Type | Condition Needed |
| Floating | Concrete, Plywood | Flat within 3/16" over 10 ft |
| Glue-Down | Concrete | Moisture ≤3 lb/24 hr |
| Nail/Staple-Down | Plywood | Thickness ≥¾", securely fastened |
| Click-Lock | Concrete, Plywood | Clean, level, and dry |
Recognizing these requirements prevents installation setbacks and transitions into preparing that subfloor correctly.
Subfloor Preparation for a Flawless Flooring Installation
Effective subfloor preparation establishes a stable foundation that prevents future issues, such as squeaks, gapping, and moisture damage. Comprehensive prep work saves time and cost downstream.
Common Subfloor Issues Affecting Installation Success
- Uneven surfaces causing plank separation
- Excess moisture leading to mold or adhesive failure
- Structural damage or loose panels creating deflection
- Debris and residue inhibiting proper bonding
Identifying these pitfalls early guides corrective measures, setting the stage for leveling and moisture control.
Proper Subfloor Leveling and Moisture-Proofing
- Test moisture with a calcium chloride or relative humidity meter.
- Install a vapor barrier or waterproof membrane on concrete.
- Apply a self-leveling compound over dips exceeding 3/16".
- Check flatness again and sand high spots if needed.
Moisture Performance of Insulated Raised, Wood-Frame Floors: A Study of Twelve Houses in Southern Louisiana
This study investigated moisture conditions in the subfloors of insulated wood-frame floor systems, particularly in hot, humid climates. It found that certain insulation types and impermeable interior floor finishes could lead to elevated subfloor moisture content, emphasizing the importance of proper moisture management to prevent issues like wood decay, mold growth, and fastener corrosion.
This research directly supports the article's emphasis on moisture control and the need for vapor barriers, especially in specific environmental conditions, to ensure flooring longevity and prevent damage.
This sequence ensures a dimensionally stable base for any installation method and leads into tools and materials requirements.
Tools and Materials for Effective Subfloor Preparation
- Moisture meter and surface thermometer
- Vapor barrier sheets or primers
- Self-leveling compound and trowels
- Sander or grinder for high spots
- Underlayment, seam tape, and adhesive
Equipped with these items, your subfloor prep fully aligns with the method chosen and transitions into the value of professional services.
Benefits of Hiring Professional Flooring Installation Services
A professional flooring contractor combines craftsmanship with technical knowledge, delivering floors that perform and look exceptional for years. Engaging experts minimizes risk and preserves warranty coverage.
How Long Can a Wood Flooring System Last?
This study proposes a methodology for predicting the service life of wood flooring systems, considering factors that influence durability. Through a fieldwork survey of 96 indoor wood floorings, it quantifies the impact of characteristics like protection type, wood type, and floor type on the estimated service life, which was found to be around 44 years for the analyzed sample.
This research provides academic backing for the article's discussion on ensuring lasting performance and durability of flooring, particularly for wood flooring, by highlighting key factors that contribute to its lifespan.
Expertise of Boston North Flooring Installers
Local professionals understand seasonal humidity, building code requirements, and material acclimation protocols unique to the Boston North climate, ensuring compliance and optimal floor performance.
Professional Services for Choosing the Best Installation Method
Flooring installation contractors provide consultations that include on-site evaluations of subfloor conditions and room usage patterns, resulting in method recommendations tailored to your material, budget, and lifestyle needs.
Typical Costs and Warranties Offered by Professionals
Installation costs range from $3 to $8 per sq ft depending on method complexity and material, with labor warranties of one to five years and manufacturer guarantees preserved through proper installation.
Installation Techniques by Flooring Type
Matching each flooring material to its ideal installation approach maximizes aesthetic impact and functional resilience within specific environments.
Best Way to Install Hardwood Floors
Nail-down remains the gold standard for solid hardwood, providing a traditional, structurally secure finish that allows refinishing. Engineered hardwood often uses glue-down for moisture control or floating where subfloor movement is a concern.
Installation Methods for Laminate Flooring
Laminate excels as a floating or click-lock system. Both methods leverage interlocking planks and underlayment to deliver a quick, DIY-friendly surface with built-in acoustic and vapor barrier properties.
Recommended Techniques for Engineered Wood Flooring
Engineered wood offers flexibility: glue-down installation ensures a strong bond to concrete, while floating installation on plywood supports expansion and contraction without adhesive.
Recommended Techniques for Vinyl Plank and Tile Flooring
Vinyl plank and tile can use glue-down for a seamless, moisture-resistant surface or click-lock for rapid installation. Both methods benefit from a perfectly flat subfloor and quality underlayment to prevent indentations.
Conclusion
Choosing the appropriate flooring installation technique aligns material properties, subfloor conditions, budget, and expected use. Professional guidance streamlines this decision and ensures long-term performance.
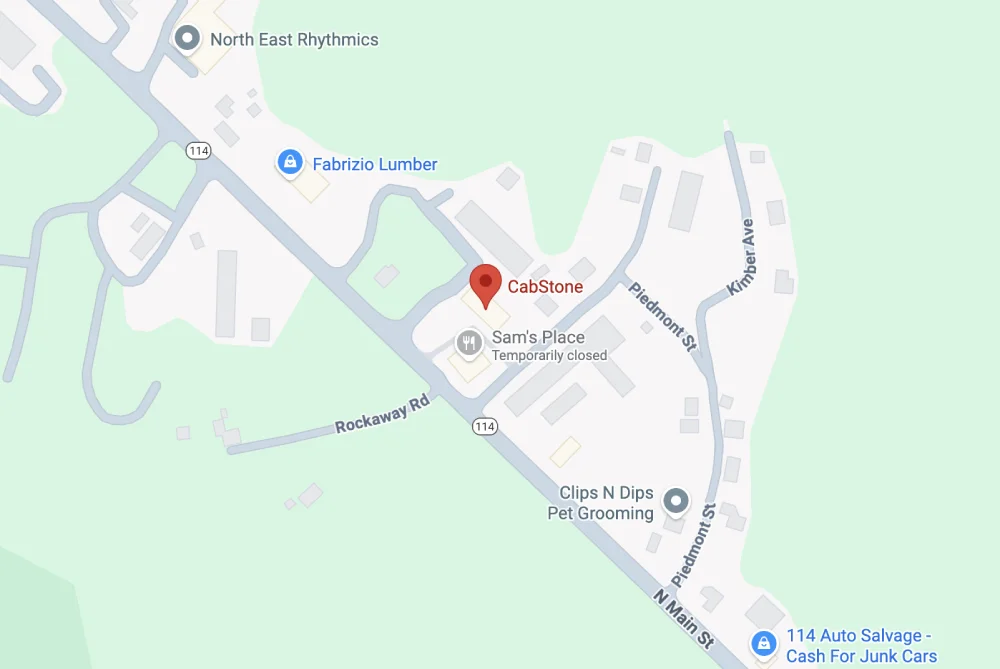
To explore tailored solutions and view material samples, schedule a consultation or visit the CabStone contractor showroom. As your trusted flooring company, we bring expertise and design-forward flooring together.
Frequently Asked Questions
What Are the 3 Most Common Flooring Installation Methods?
Floating, glue-down, and nail/staple-down installations dominate installations: floating for laminate and engineered wood, glue-down for vinyl and tile, and nail/staple-down for solid hardwood.
What Is the Easiest Type of Flooring to Install?
Click-lock laminate and luxury vinyl plank rank as the easiest, thanks to interlocking edges and minimal tools, allowing nearly anyone to achieve professional-looking results.
How Do Floating and Glue-Down Flooring Differ?
Floating floors rest on an underlayment without adhesive, permitting movement and easy replacement, while glue-down floors bond directly to the subfloor for a more rigid, moisture-resistant surface.
When Should You Choose DIY Installation vs Hiring a Professional?
Opt for DIY on straightforward floating or click-lock projects under 500 sq ft with level subfloors; search for flooring contractors near you for nail-down hardwood, large areas, moisture-sensitive installations, or when seeking warranty protection.
How Does Subfloor Preparation Impact Installation Success?
Proper leveling, moisture control, and substrate integrity form the foundation of any installation; overlooking these steps leads to gaps, adhesive failure, and premature wear regardless of the method selected.
Can I Install New Flooring Over Existing Flooring?
In some cases, yes. However, it depends on the type of existing flooring and the new flooring material. Generally, a smooth, level, and structurally sound existing floor can serve as a subfloor for certain new materials like vinyl plank or laminate. However, it's crucial to check manufacturer guidelines, as installing over certain materials (like carpet or uneven tile) can lead to issues.
What is the role of an underlayment in flooring installation?
An underlayment is a layer installed between the subfloor and the finished flooring. Its primary roles include providing cushioning, improving sound insulation, offering a moisture barrier (especially for concrete subfloors), and helping to smooth out minor imperfections in the subfloor. The type of underlayment needed varies significantly by flooring material.
How important is acclimation for new flooring?
Acclimation is crucial, especially for wood and laminate flooring. It involves letting the flooring material sit in its intended installation environment for a specified period (usually 48-72 hours) before installation. This allows the material to adjust to the room's temperature and humidity, preventing expansion or contraction issues after installation, which can lead to gapping, buckling, or warping.
What are the risks of improper moisture management during installation?
Improper moisture management can lead to a host of problems, including mold and mildew growth within the subfloor and flooring layers, adhesive failure (especially for glue-down installations), warping or cupping of wood and laminate floors, and corrosion of fasteners. For concrete subfloors, a lack of a proper vapor barrier is a common culprit.
How does the direction of plank installation affect the room?
The direction of plank installation can significantly impact the visual perception of a room. Typically, planks are laid parallel to the longest wall or in the direction of the main light source. This can make a room appear longer and wider. Laying planks perpendicular to the main light source can highlight imperfections, while laying them at an angle can create a dynamic visual effect but is more complex to install.